Adventures in over-engineering: using AI to watch my $200 walking pad
We’ve entered The Big Dark here in the Pacific Northwest, which means the days are shorter and wetter. Usually, during the summers, I am an active hiker and walker. As soon as winter hits though, I turn into a sedentary gremlin. As I lamented the 4:30pm sunsets, I noticed my unused walking pad taunting me in the corner of my office. I had purchased it 3 years ago to help me get steps in while I worked. I was consistent with it here and there, but not nearly as much as I’d like to be. One thing that made it hard to stay on track was the fact that I am a metrics-obsessed automaton and needed some way to incorporate the stats from my walking pad in to the Apple Health data I used to track my overall fitness. The usual answer you’ll find for tracking your steps while walking on a walking pad beneath a desk is to attach your Apple Watch to your ankle. I’ve done this before and the stats you get off of it are overcounted given watches were made to be worn on wrists. Not to mention wearing an Apple Watch on your ankle is annoying and we’re here to over-engineer after all. So, I set out to figure out if there was a way for me to synchronize stats from my walking pad into my fitness data.
If you’ve been following me for a while, you might remember my infamous blog post about attempting to “hack” my smart vibrator by doing some sniffing on the packets it transmitted over BLE. I started my efforts here on the same vein. Could I possible sniff the packets the walking pad transmitted over Bluetooth to get the on-device stats? To make a long story short, it turns out this cheap ol’ walking bad did not have BLE support. I had somehow convinced myself it did because the original manual pointed to an iOS app that I could use to control the walking pad and gets stats off if it. That app is no longer on the App Store (figures!) and any efforts of reverse engineering the Bluetooth-based protocol it used (if it did at all) are dashed.
OK, so we’ve gotta figure out some alternatives. I considered a couple of options for getting the stats I needed out of the walking pad:
- Purchasing a BLE-enabled footpod or pedometer and building an app that would capture the telemetry from that.
- Setting up a laser or pressure sensor against the tread and using it to calculate the number of steps taken, then extrapolating distance from that.
- Attaching an old camera to capture the view of the display on the treadmill that displayed stats about distance/time/steps and using image analysis to capture them,
Of the three options, the third seemed like the most interesting. I don’t really want to have to attach something to my shoe (IMO, that’s worse than attaching something to your ankle). The laser/pressure sensor sounded like a really fun tangent to go down but it’s been a while since I’ve tinkered with sensors. Not to mention I’d have to order some parts and I didn’t want to waste any time waiting before I commenced the hacking. The third options is the most ripe for learning and misadventures so I went with that one.
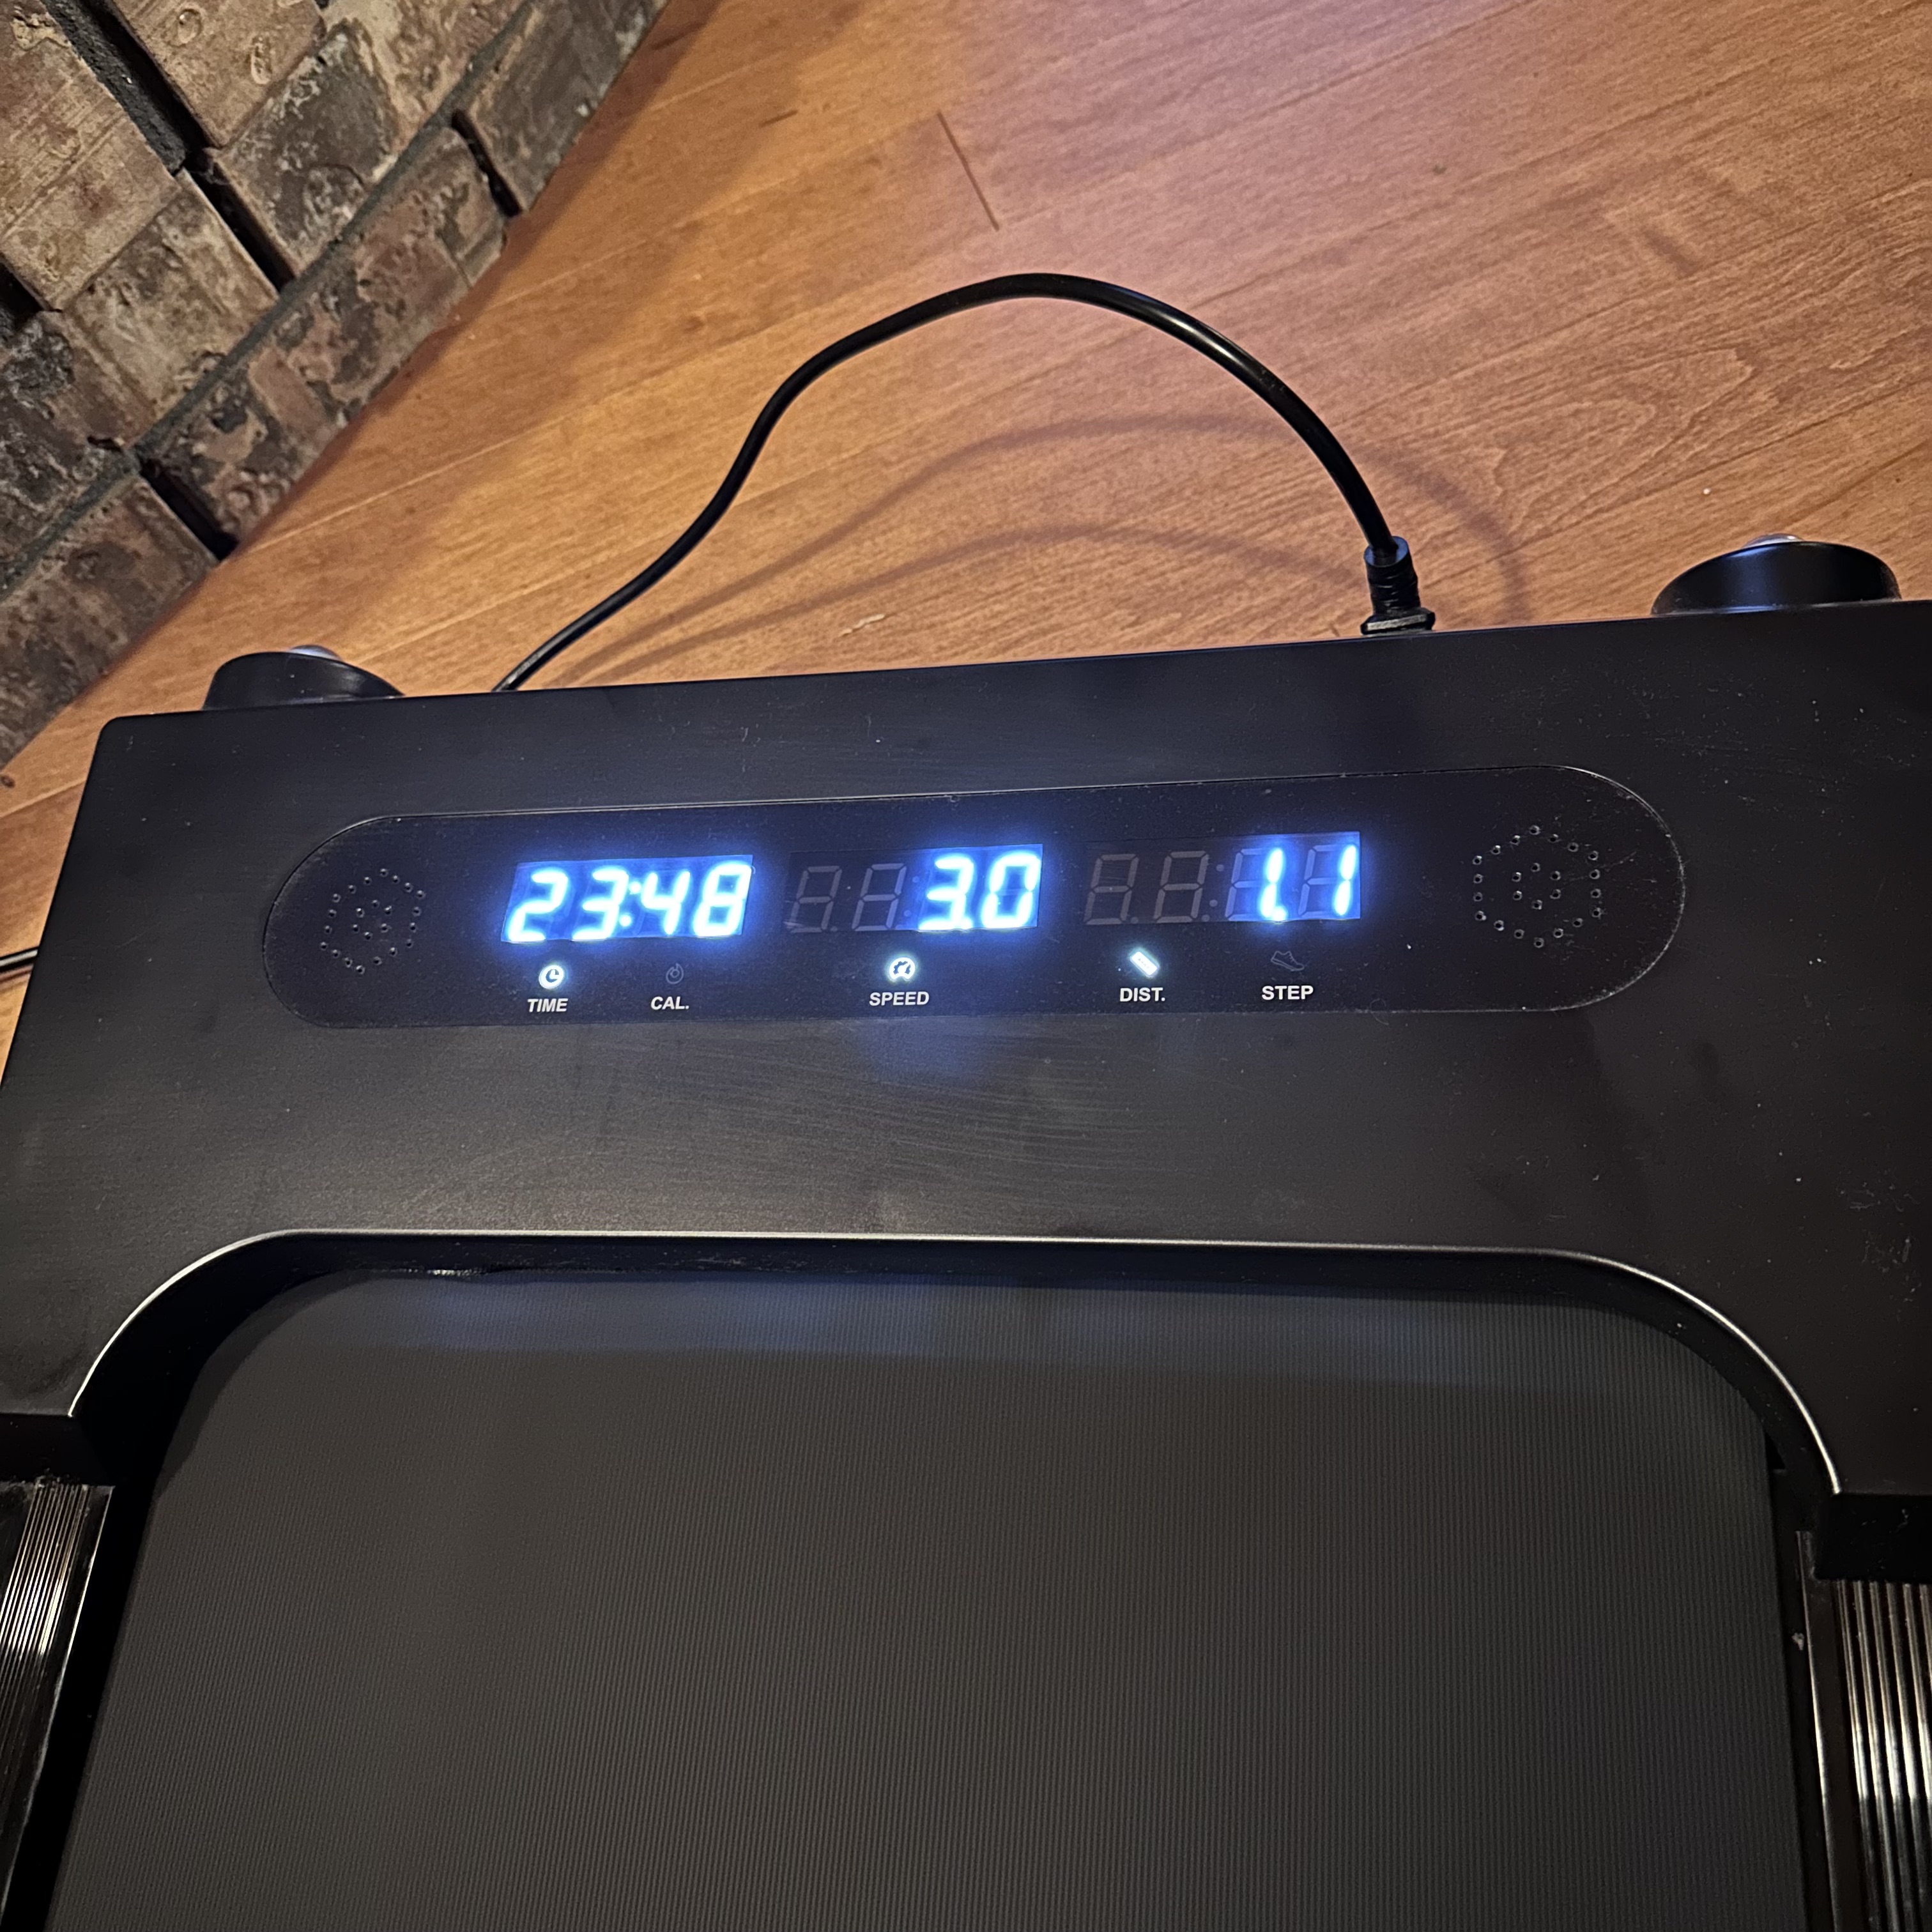
I didn’t have any spare webcams handy, but I did have an old Android phone that I could mount below my desk to capture a video feed of the walking pad. I toyed around with the idea of building a proper Android app to do capture the video stream from the camera and do the image processing. I decided to be less adventurous today and stick with the web technologies that I was familiar with. After all, I wasn’t planning on doing super compute intensive image analysis. Capturing the image feed every 10-30 seconds to analyze where things were was more than enough fidelity for what I wanted.
Because code is cheap these days and you’re one prompt away from a starting point, I was quickly able to prompt Claude Code get a website going that uses the browser’s camera APIs to capture frames from the on-device camera and “analyze” the digital display on the walking pad for the number associated with the time spent walking, distance traveled, and steps taken. When your working with LLM-based code gen tools, your job turns into verifier and tester To make it easy for me to verify the image analysis code, I used a local Python HTTP server to expose the index.html file that was generated over HTTP and then used DevTunnels to make my localhost available through a public host that I could access on my phone.
The original implementation that Claude generated used Tesseract to do image analysis and I spent a bunch of time tweaking the OCR parameters to get the right behavior. I also took a stab at trying a TensorFlow-based image analysis implementation. I’m by now means an “AI Engineer” but I appreciate the complexity of getting these things right. The moment the lighting or camera angle shifted, the OCR lost its touch and started hallucinating digits. Small quirks with the way the screen behaved, like the fact that the ”:” separator on the time blinked threw things off as well.
Eventually I gave up client-side image analysis solutions and figured I might bring in the big guns for this. I reached for the Azure AI Vision service since my employment at the Blue Sky Cloud Company gives me the privilege of some free Azure credits. It was better, but not great. The model still got confused if the display washed out or if my phone drifted or lighting changed, but at least it was picking up the contiguous segments of numbers across the 3 parts of the display. The whole experience gave me a renewed appreciation for how absurdly robust the image pipelines and detection are on modern phones. How the heck are we able to teach electrons to see? Wild!
At this point, I realized the over-engineering show was really in full swing. I needed figure out a way to fine-tune the model specifically for the task of detecting digits on this treadmill. I added a tiny bit of code to dump the captured frames into Azure Storage with the goal of having a corpus of images that I could label myself. At some point I’ll sit in front of the TV (probably watching Real Housewives), scroll through them, and mutter things like “How did you think that was a 6?” at myself. The natural next step after that is to figure out how to fine-tune a model based on this data set.
Also, because my simple little app had taken on some cloud dependencies, I needed to scale my implementation. I moved the logic for interacting with the Azure APIs to a back-end minimal API implementation that also hosted the static assets associated with my front-end. I used Aspire to orchestrate the provisioning of my Azure dependencies, including Azure Storage and Azure AI Foundry (apparently needed for the vision service) and the launching of my app. Aspire also has an integration with DevTunnels that I could use to wire up tunneling for my service.
In the process of trying to get Azure Vision working with AI Foundry, I ended up knee-deep in API access errors that metaphorically pushed me to the edge and literally caused me to waste a couple of hours on my Saturday. After I burned that precious time, I bailed and switched to a bog-standard OpenAI model running on Azure OpenAI. I figured I could just simulate what I am so used to doing with ChatGPT on my phone: “here’s an image, please tell me what numbers you see.” with programmatic APIs. Once I got GPT-4o configured in East US with a super simple prompt, the results were surprisingly superb. Better than Azure Vision by a mile and I might not have to manually label thousands of frames after all.
The implementation I landed on uploads each captured frame to Azure Storage, hands the model a URL to the stored image, and asks it to extract the three stats I care about and return the response in a JSON payload. I’m far from doing everything on the client and since I’m now relying on a heavy LLM to do the work, I opted to capturing frames once every 20 seconds. I gave the implementation a quick test with a 10 minute walk on the pad.
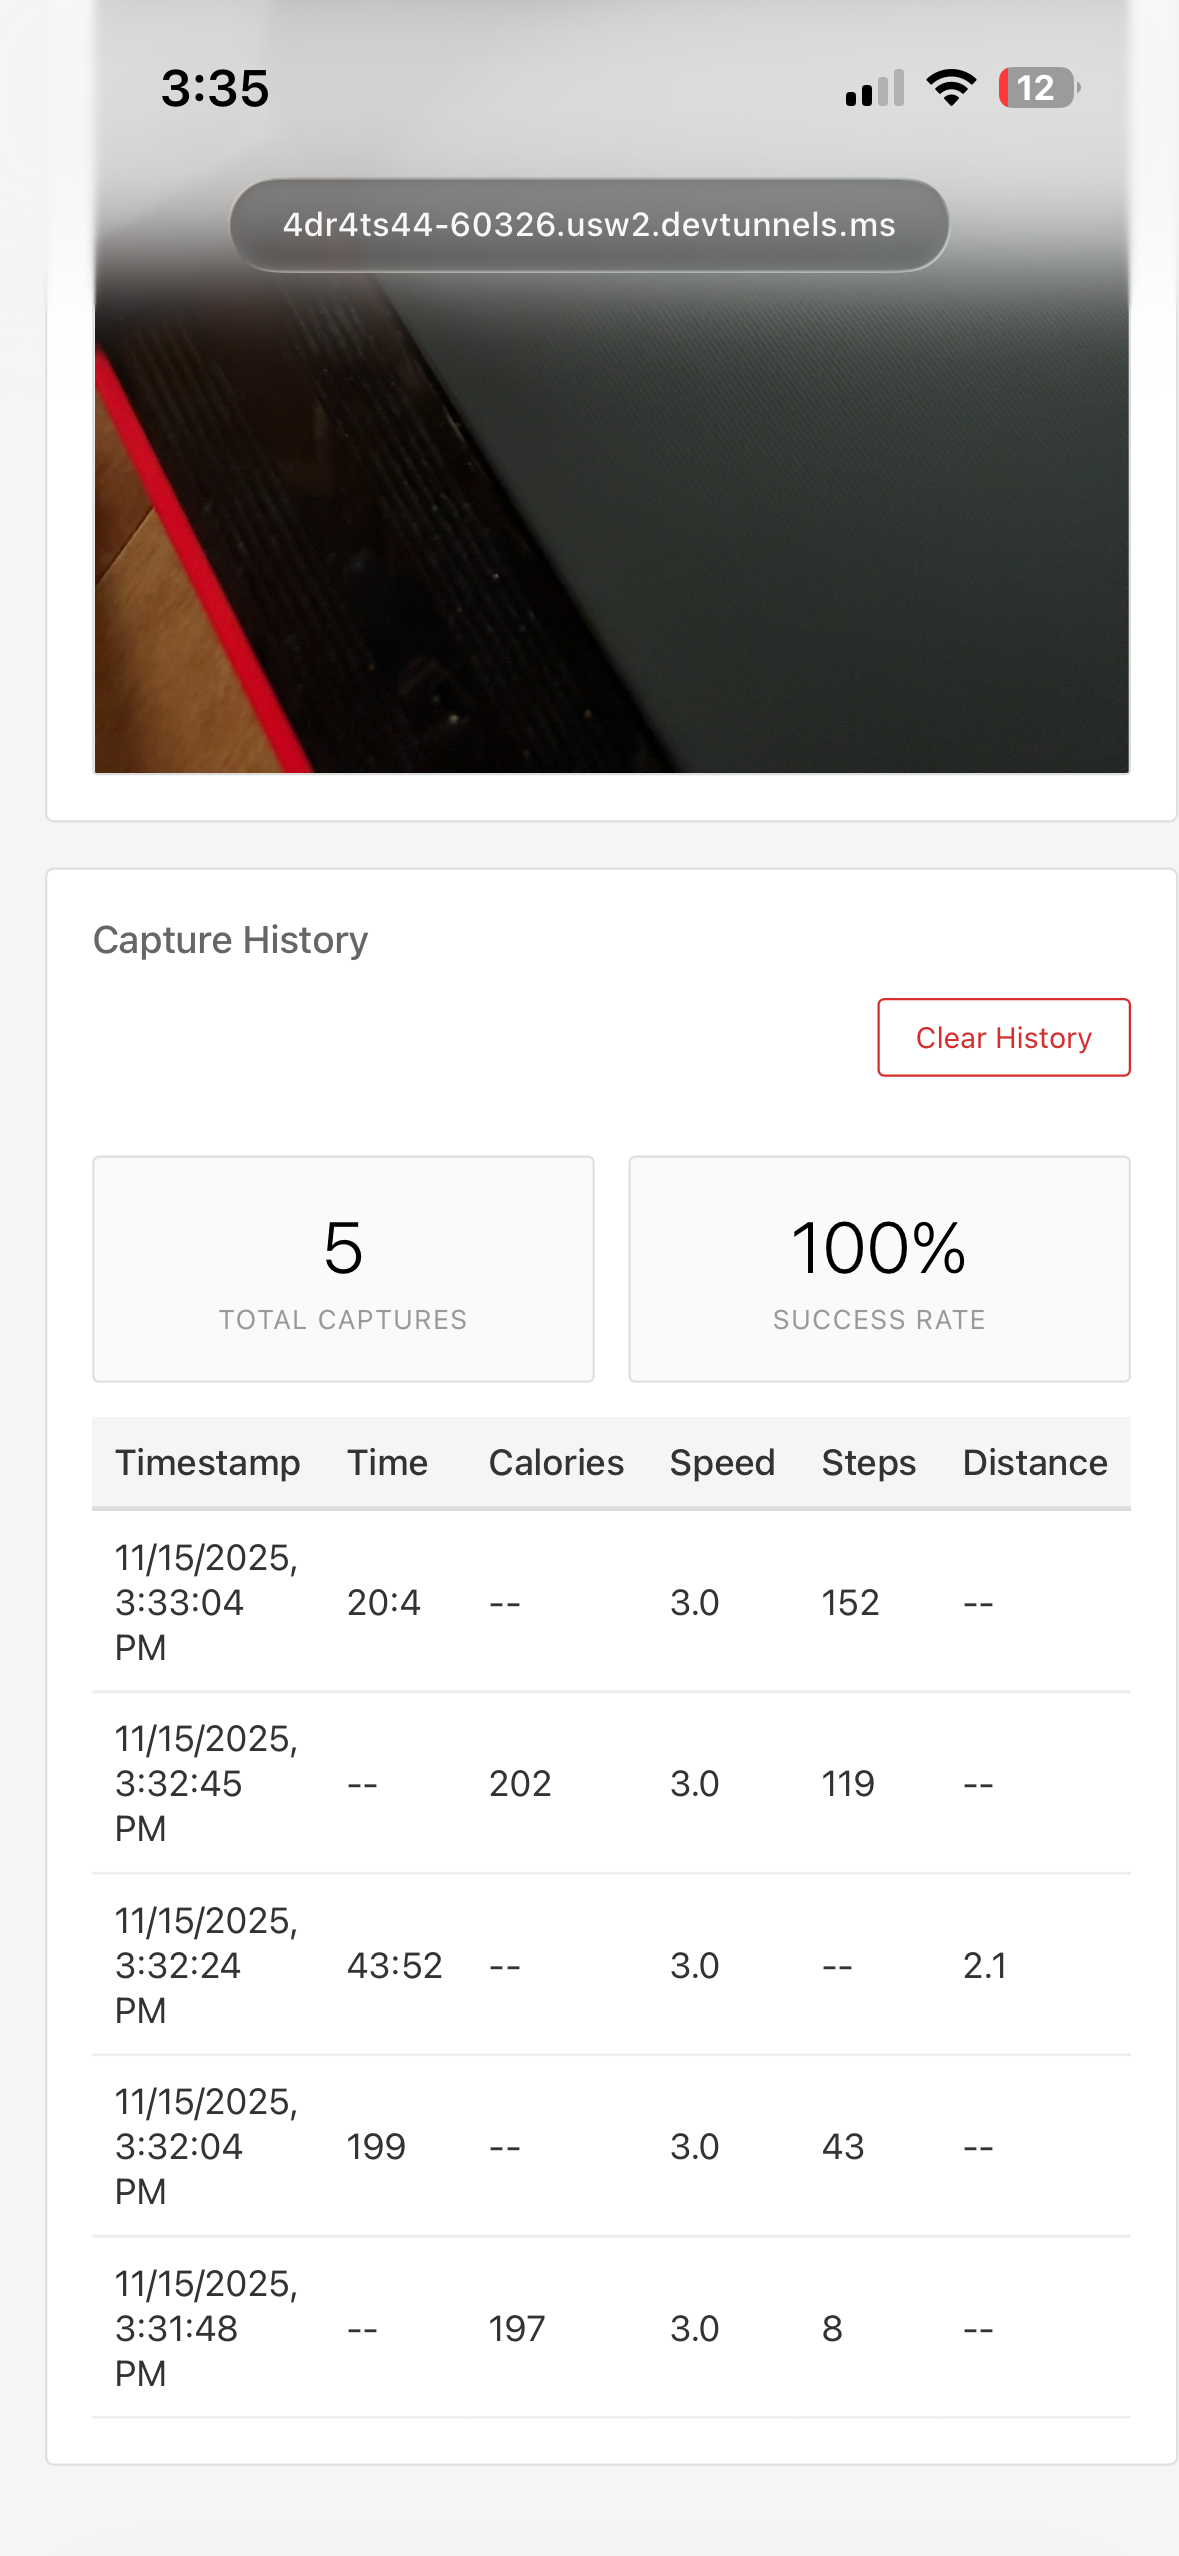
Holy crap! It actually works! As you can see from the screen grab above, the model is not perfect. It seems to have trouble in particular distinguishing between the values that alternate between time and calories on the display, likely because of that blinking ”:” separator that I mentioned earlier. There might be some opportunity to do fine-tuning on the model with manually labelled data after all. The app is still storing stats on local browser storage so there’s an opportunity to do something better there with a full-on persistent database. Also, the “capture frames every 20 seconds” logic was a recipe for hitting rate limits so I’ll probably tweak this as well. I hope to use the prototype for a week and observe the quirks. Surprisingly, in the process of distracting myself from actually walking I might’ve given myself a new motivation to walk.
So all in all, this escalated from a simple client-side image hack to a full AI-powered Rube Goldberg machine before I knew it, and the experience gave me a new appreciation for the grind of fine-tuning and hand-labeling data: the same way getting better at prompting has taught me to appreciate how these models “think”. Once I started interacting with more cloud resources, I was really thankful for Aspire handling the annoying parts of provisioning and wiring everything up, Also, the AI APIs available in .NET made this surprisingly easy. I have to admit the whole contraption worked a lot better than it had any right to. The core logic was basically done with a single API endpoint:
api.MapPost("/analyze", async (AnalyzeRequest request, IChatClient chatClient, ILogger<Program> logger, CancellationToken cancellationToken) =>
{
    try
    {
        var messages = new List<ChatMessage>
        {
            new(ChatRole.User,
            [
                new TextContent("This is a walking pad LED display. Extract all the numbers shown. Return the numbers in a JSON format with the first number labelled as either time or calories, the second as speed, and the third as either distance or steps. Make sure numbers include colons and periods. Example: {\"time\": \"12:34\", \"speed\": \"5.6\", \"distance\": \"1.1\"} or {\"calories\": \"1234\", \"speed\": \"5.6\", \"steps\": \"2345\"}. Return only the JSON object, no additional text."),
                new UriContent(new Uri(request.ImageUrl), "image/png")
            ])
        };

        var response = await chatClient.GetResponseAsync(messages, cancellationToken: cancellationToken);

        if (response.Messages is not null && response.Messages.Count == 1)
        {
            return Results.Content(response.Messages[0].Text, "application/json");
        }
        else
        {;
            return Results.Problem("No response from AI model.");
        }
    }
    catch (Exception ex)
    {
        return Results.Problem($"Error: {ex.Message}");
    }
});
To see the full code for this hack, check out this GitHub repo that contains the implementation.